Total Pageviews

Showing posts with label DIY. Show all posts

Wednesday, July 3, 2013

Polyvore?

We're getting everyone involved for this Stars and Stripes Week, including the new and HOT design site POLYVORE!


What's Polyvore?

Polyvore lets you design just about anything you want in a collage style.


Ex.:

Wonderful Designs by LewLew53


Little known fact: LewLew53 is Deporian's mother, and we'd like to personally thank her for all her support, especially her recent design called "The 4th is coming, what are you wearing?"


Thanks mom! We love you!


 *Follow our mom on Polyvore here: Deporian's mom on Polyvore!


Deporian has also joined the Polyvore community!


Here's our 4th of July Contest room!


*Like our designs here: Deporian on Polyvore


What do YOU guys think of Polyvore? Are any of you also a part of the Polyvore Community? Let us know below!

                                       <<<---------------------------------------------------------->>>


Have any other really cool sites that you use to get your creative juices flowing? Tell us that, too!

Monday, July 1, 2013

Item of the Day! CROPTOPS


Croptop


Summer Croptop

                         Summer Croptop by tuc11254 featuring a fringe shirt


*Summer Tip-There are 3 types of Croptops to sport this summer :)


#1-Manufactured 


Tops: Rue21


Buy a croptop that was well... made that way!


#2-Manipulated


Right: Rue 21


Take that old button-down top and tie it at the waist


#3-Cut it up

Left: Swag from Zombie Run (Philadelphia)
Right: Custom


Croptop Look of the day!!!


Top: Designed by Portia D.
Knitted Vest:
Necklace: Vintage
Boots: Burlington Coat Factory


Do you guys like this new trend, or think it's a total flop? Let us know below :)


You might also like:


Facebook (DeporianOtt)

Youtube: DeporianOtt

Email us your cute looks:Deorian2011@gmail.com


***Extra extra!!! (Behind the scenes footage on set)***


Wednesday, July 13, 2011

As Requested-- How to Make CUSTOM RIPPED JEANS

We'd like to show some love to RUSSIA, AUSTRALIA, IRELAND, ITALY, and The UK for showing us so much love over the years! We know your watching, and we love you :)

How to Make your own CUSTOM RIPPED JEANS! Hosted by Mack the Ripper


 Derris Montgomery as Mack the Ripper


"The whole point of creating ripped jeans is so that your brand new jeans look like they've been around a few decades."


Shirt: H&M
Custom Shorts (pants): American Eagle
Scarf: Vendor
Necklace: Kohl's
Shoes: 21 Men
Bracelet: Convention
Belt: Target


"Creating ripped jeans is actually quite simple. All you need is an exact o knife and jeans."


Firstly: There are several TYPES of rips to make.


#1 The Line...


The line is the most simple RIP, and eventually becomes a HOLE.


 DIRECTIONS: Cut a horizontal line in your pants. Duh.


#2 The Screen

Very similar to a HOLE, but instead of exposing your precious flesh and giving you skin cancer, the lines of the jean are left intact.


DIRECTIONS: SCRAPE (do NOT cut) across the jeans in whatever shape you desire, whether a square or a more organic shape as seen here.


#3 Texture


It's important that your jeans are given an overall TEXTURE, so that they look old as shit, in a good way.


DIRECTIONS: Scrape along the POCKETS, BELT LOOPS, and the TOP and BOTTOM EDGE of your pants.


TO DISPLAY THE LAST 3 TYPES OF SIMPLE RIPPING, WE PREPARED A SAMPLE


#4 The Ladder


Portia D. as The Legs

Pants: Rave

 This is simply a bunch of lines cut closely underneath each other to resemble ladder pegs.


DIRECTIONS: Put on the jeans and decide where you want your ladder to begin and end. Mark those places in marker or chalk with a small line. 


Then Cut.


This is what it looks like with the raw cut.


Next you wash and dry them, this frays the jeans.


#5 The Gun Shots


"So called because the holes make it look like you got shot in the leg... so if you're into that..."


It actually kind of looks like embroidery.


DIRECTIONS: Mark different size X's or T's and cut along the lines.


Doesn't look like much before the wash, does it?


#6 The Claw

This is one that we experimented with, but we found we really liked it.


DIRECTIONS: Instead of horizontal stripes like with the ladder, mark VERTICAL stripes where you desire them to start and stop. 


We really loved how it turned out being only in the calf area!

Of course, you cut next.


Wow, really does look like she got clawed.


If you haven't gotten the idea, the wash is what makes the MAGIC that is RIPPED JEANS possible. While also increasing elasticity in your pants (i.e. makes those skinny jeans a whole lot tighter)


And after the magical wash and dry, you've got quality claw marks.


There are lots of ways to customize your rips, safety pins, beads, threading. Experiment. Make those jeans you bought yesterday look like a hundred year heirloom. 


You never know, your jeans could start the next Sisterhood of the Traveling Pants.


<<<---------------------------------------------------------------->>>


What else do YOU do to customize your wardrobe? Let us know below!


<<<---------------------------------------------------------------->>>


Don't forget to rate and share this if you thought it was interesting!


You might also like:


Friend us on facebook: (Deporian Ott) 
Twitter: @Deporianott
Youtube: Deporian Ott


Credits

Photographers: Derris Montgomery and Portia D.
Makeup Artist: Derris Mongtomery
Makeup: NYX Mascara, Mary Kay Foundation


    Tuesday, July 5, 2011

    11 Ways to Wear an Infinity Scarf! (Surprising)

    Because of economic downfall and her family being committed to an asylum, Bea Dreary now has nothing but a tank, daisy dukes and a circle scarf!


    With the help of her new lesbian lover, Bea discovers 11 different ways that scarves are no longer just for necks!


    1. Monday's look--The Bodice


    LizBeth returns as Bea Dreary


    Made by double tying the scarf around her body.


    2. Tuesday's Look--The Mini dress


    Double tied around her body then pulled down. Then it was adjusted to her body.


    3. Wednesday's Look--The Pencil Skirt. Bea had an interview with McDonald's. GOOD LUCK!


    Double tied then pulled down to her hips.


    4. Thursday's Look: The Belted Tunic. Bea has found a belt!


    She put on the scarf like she was wearing a jacket and covered her breasts. Then placed the scarf up like a hood and belted around her waist.


    5. Friday's Look: The Shrug 1: At the Beach


    She placed the scarf once on her body, twisted an arm hole to put her arm through, then twisted another arm hole.


    6. Saturday's Look: The Shrug 2: At the Beach, Day 2


    Instead of twisting two arm holes, she put the extra fabric over her arm.


    7. Sunday's Look: The Shrug 3: At the Beach, Day 3


    She placed the scarf loosely on her body, then twisted a neck hole and placed her head through. She adjusted to cover her breasts.


    8. Monday's Look: The Flowing Dress


    She let the scarf hang loosely on her body, pulled out completely, then folded the extra fabric in front until it fit. This created ruffles. Then she belted it.


    9. Tuesday's Look: The Halter Dress, for her date!


    She placed the scarf loosely over her body, belted at the small of the waist. Then she tied the top parts around her neck in a halter. 


    10. Wednesday's Look: The Flowing Skirt


    The scarf hung loosely and pulled out around her body, then belted at the waist. Then she laid the extra fabric down to create an extra layer of skirt.


    That belt really comes in handy!


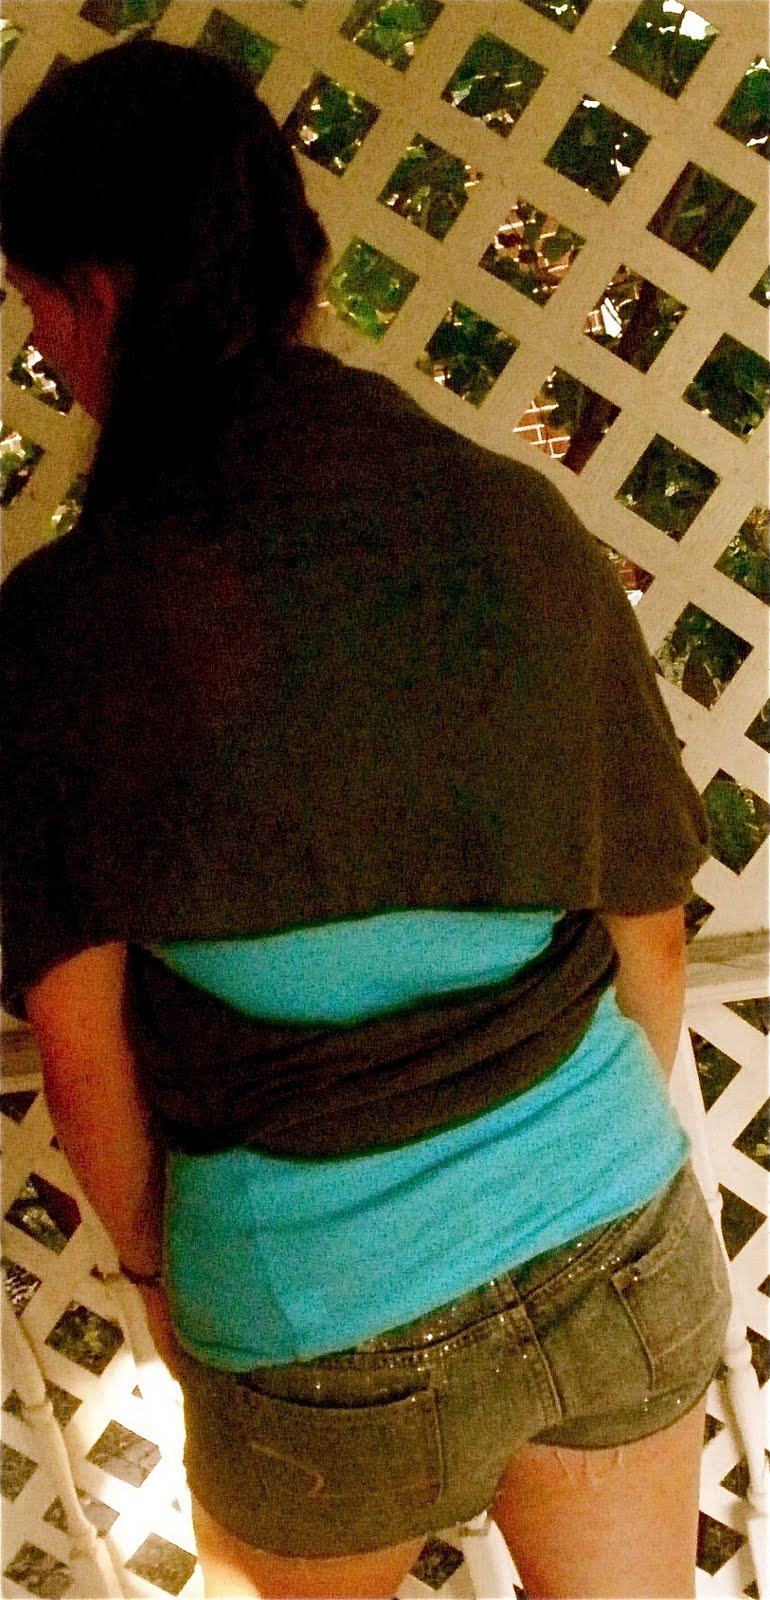
    11. Thursday's Look: The Cardigan


    She put the scarf loosely on her body, then placed the front behind her head and adjusted until the scarf looked like a cape in the back.


    Tank: Kohls
    Shorts: American Eagle
    Scarf: Philadelphia
    Belt: Tex by Max Azria


    What other looks can YOU do with a scarf? Let us know below!


    <<<------------------------------------------------------------------->>>


    Don't forget to rate and share this if you thought it was interesting!


    More DIY posts like this!!!


    <<<--------------------------------------------------------------------->>>


    Credits


    Photographer: Portia D.
    Makeup Artist: LizBeth
    Makeup: Neutrogena, NYX, Big Fatty Mascara